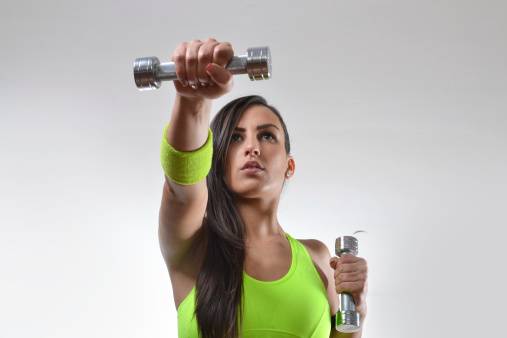
Perhaps one the most frequent requests I hear from clients at Lucille Roberts is, “I want to tone my arms!” When I ask further exactly what they mean—definition, sculpting, toning, or increasing size—I always hear an answer that tells me that the client wants to see cuts and definition. This requires working hard on one’s deltoids (shoulders), the triangularly-shaped muscles which encompass almost the entire upper half of the arms. You cannot sculpt your arms without properly working your shoulders! So, let’s get started.
The lateral delt (or middle delt) cuts right into the side of the upper arm and helps bring out tricep and bicep definition. I like to work this part of the arm and shoulders unilaterally (one side at a time) because many women have an uneven amount of strength between the two sides. This can be balanced and allows us to maintain perfect form and execution of the exercises. When you see those spectacular cuts throughout the entire upper arm, you will know the effort was worth it!
What follows is a four-part shoulder workout. You can do this workout 2-3 times per week, on non-consecutive days. However, if you have a shoulder injury, do not do this or any routine; speak to your doctor first about how to rehabilitate this area. A trainer can work with your physician and/or physical therapist to help you strengthen your shoulders safely.
Front Raise The front of the upper arm and shoulders (the anterior deltoid) portrays an array of striations and cuts that look absolutely incredible when developed. For this exercise, never use a weight that is too heavy—3 lb. or 5 lb. is plenty, especially in the beginning. Shoulder injuries are common and often caused by poor form, heavy weight, or too much repletion.
Stand with your feet shoulder-width apart, hips tilted forward (toward the mirror or wall in front of you), knees slightly bent. If you have a knee injury, you can sit on a Swiss ball for “helper muscle” and core activation and to take pressure off your knees. Hold one light weight in your hand, right in front of your thigh. Face your palm toward the floor; don’t lock out your elbow. Raise your arm to the level of your shoulder or about 1-2 inches higher than shoulder height; then slowly lower the weight and repeat with the same arm (unilateral training) 8-15 times. Exhale on the elevation, and inhale as you lower the arm. Don’t change arms! Do only one set. Allow yourself a few seconds to get your gusto up, then tri-set this. In other words, do three exercises, back to back with no rest or recovery in between, on the same arm. You will love the results of this technique! If you need to, rest for about 1/2 minute between sets, especially if you are a beginner (you may even need 1 full minute’s rest).
Side Lateral This exercise will literally give you definition down the entire side of the upper arm and really bring out the tricep (back and side of the upper arm) and bicep (the front of the upper arm) like never before! With the same arm, bring the dumbbell to the side of your body. Face your palm toward your thigh and start with the dumbbell at the thigh. Do not lean forward! Hips should be tilted forward and your back kept straight or “neutral”. Raise the weight up to the level of the shoulder or 1-2 inches higher, at most. If you lift too high or go too heavy, you will risk injury and lack focus on the side of the upper arm (the lateral delts). Exhale as you lift the weight. Your palm should face the floor at the top of the range of motion (at about shoulder level). Inhale as you lower. At the top of this movement, if desired, you can tilt the pinky slightly up to the ceiling and palm toward the back wall. You will feel the side of the arm and shoulder engage even more! Do 8-15 repetitions—only 1 set. Then, go right into the next exercise for maximum results and definition!
Shoulder Press or Military Press This hits the front and side of the upper arm at once. You have just fatigued both, so get ready for a challenge! You are using the same arm, no recovery, and the same form as the prior two exercises, tilted hips, knees slightly bent, back upright. This time the dumbbell starts at shoulder level, with the palm facing the mirror or wall in front of you. Exhale and raise the dumbbell straight up above your shoulder. Do not lock out your elbow at the top. Inhale as you lower the weight back to shoulder level, and repeat 8-15 times. Now you can rest for about 1 minute.
Repeat all three of these exercises (front raise, side lateral, and shoulder press) in the same fashion with a slightly higher weight if you can. For example, use a 5 lb. dumbbell instead of a 3 lb., and continue on the same arm for 2-3 sets total. Your recovery or rest comes after all three exercises are completed on one side. Rest for 30-60 seconds, and repeat again, 8-15 repetitions. You will total 2-4 sets on one side only. Then switch arms and repeat the exact same thing. You will feel the burn, so break if you need to. After you have completed all three exercises on the other side (2-4 sets), give yourself a 2-3 minute rest or recovery period and finish it off with the last exercise, below.
Bent Over Raise No arm and shoulder routine is complete without hitting the back of the upper arm and shoulders—the posterior or “rear delts”. If you have a back injury, sit on a Swiss ball or exercise bench to take pressure off the lumbar (lower) region of your back. You will also engage your core muscles this way. However, you will get slightly more calorie burn by standing. Stand with your legs together; bend your knees and hinge forward at your hips. Bend forward from the hip area until you are almost parallel to the floor with your chest. This helps to target the area effectively. Tighten your abdominals to protect your spine. Your palms face each other with both dumbbells firmly grasped. As you raise the weights up and toward the ceiling, your elbows remain slightly bent and come up to the level of your shoulders, or 1-2 inches higher. Do this 8-15 times. You can use a slightly higher weight if you wish; start with a set of 5 lb. dumbbells and gauge how you feel. Exhale as you lift, and inhale as you lower. Rest for about 30-60 seconds between sets by bringing your back upright again as you recover. Repeat 8-15 times, for 2-4 sets with recovery of about 30-60 seconds between each set. Stand or sit straight again as your energy builds for the next set. You may try a set of 8 pound weights for this one if you like, but don’t go too heavy, as you don’t want to injure this sensitive area.
When finished, stretch! Place one arm in front of your chest and push your elbow toward your body. Repeat this stretch on the other arm.
Have fun, and enjoy your sculpted, defined arms and shoulders!
Trainer Tip by Sandra Ferrerio, certified LiveRite weight loss coach, trainer, and class instructor at Lucille Roberts in Yonkers. Read her full bio here.


